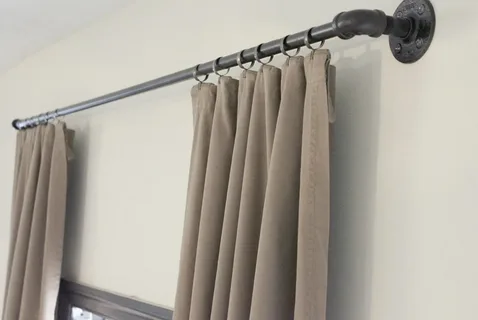
A Step-by-Step Guide to Installing Curtain Rods Like a Pro

Installing curtain rods may seem like a simple task, but doing it correctly can make a significant difference in the appearance and functionality of your window treatments. Whether you’re hanging curtains for the first time or replacing existing rods, following a step-by-step guide can help ensure a professional-looking finish. In this comprehensive guide, we’ll walk you through the process of installing curtain rods with precision and confidence.
Gather Your Tools and Materials
Before you begin, gather all the necessary tools and materials for the installation process. You’ll typically need the following items:
- Curtain rods and brackets
- Measuring tape
- Pencil
- Level
- Screwdriver or drill
- Wall anchors (if needed)
- Screws
Make sure you have the correct size and type of curtain rods and brackets for your windows, as well as any additional hardware required for installation.
Measure Your Windows
The first step in installing curtain rods is to measure your windows to determine the appropriate placement for the rods. Measure the width of the window frame or the area you want the curtains to cover. For standard windows, the curtain rod should extend several inches beyond the sides of the window frame. Hence to allow the curtains to hang properly and provide full coverage when closed.
Additionally, consider the desired height for mounting the curtains rods. Most curtain rods are installed approximately 4 to 6 inches above the window frame to create the illusion of height and make the windows appear larger. However, you can adjust the height based on your preferences and the style of your curtains.
Mark the Mounting Points
Using a pencil, mark the mounting points for the curtain rod brackets on the wall. Start by marking the positions for the end brackets, ensuring that they are level and evenly spaced on either side of the window. Then, if your curtain rod requires a center support bracket, measure and mark the position for the center bracket between the end brackets.
Use a level to ensure that the mounting points are straight and evenly aligned. This will help prevent the curtain rod from hanging crookedly once installed.
Pre-Drill Holes (If Necessary)
If you are installing curtain rods into drywall or plaster, it’s a good idea to pre-drill holes for the screws to prevent the wall from cracking or splitting. Use a drill bit that is slightly smaller than the diameter of the screws you’ll be using.
For installation into wooden window frames or studs, you may not need to pre-drill holes. However, using a pilot hole can still help guide the screws into place more easily. Read more: https://blogrism.com/sofa-cushion/
Install the Brackets
Once you’ve marked the mounting points and pre-drilled any necessary holes, it’s time to install the brackets for the curtain rod. Position each bracket over the marked mounting point and align it with the pencil line.
If your curtain rod brackets have multiple screw holes, make sure to use all available holes for added stability. Insert the screws provided with the brackets into the pre-drilled holes and use a screwdriver or drill to secure the brackets firmly to the wall.
Attach the Curtain Rod
With the brackets securely in place, it’s time to attach the curtain rod. Depending on the design of your curtain rod, you may need to insert the rod through the brackets or attach the rod to the brackets using screws or other fasteners.
Carefully slide the curtain rod into the brackets, ensuring that it is level and evenly positioned. If necessary, use a level to double-check the alignment of the rod before securing it in place.
Hang Your Curtains
Once the curtain rod is installed, it’s time to hang your curtains. Simply slide the curtain panels onto the rod, ensuring that the rod passes through the rod pocket or curtain rings.
If you’re using curtain rings with clips, attach the clips to the top edge of the curtain panels and then hang the rings onto the rod. Make any necessary adjustments to ensure that the curtains hang evenly and are properly aligned with the window frame. Read more: https://blogrism.com/
Test for Smooth Operation
After hanging your curtains, test the curtains to ensure they open and close smoothly without any obstructions or friction. Gently pull the curtains across the rod to make sure they glide effortlessly along the curtain rod without getting stuck or catching on the brackets.
If you encounter any issues with the operation of the curtains, such as stiffness or resistance, double-check the alignment of the rod and brackets to ensure they are properly installed.
Make Final Adjustments
Once the curtains are in place and operating smoothly, take a step back and assess the overall appearance of the window treatment. Make any final adjustments to the positioning of the curtains or the alignment of the rod to achieve the desired look.
If necessary, use a pencil to mark any additional adjustments or corrections that need to be made, such as repositioning the brackets or adjusting the height of the rod.
Enjoy Your Newly Installed Curtains
Congratulations! You’ve successfully installed your curtain rods like a pro. Step back and admire your handiwork, and enjoy the enhanced beauty and functionality that your new curtains bring to your space.
Conclusion
Installing curtain rods may seem daunting at first, but with the right tools, materials, and techniques. Therefore you can achieve professional-looking results with ease. By following this step-by-step guide, you can ensure that your curtain rods are installed securely and accurately, allowing you to enjoy your window treatments for years to come.


