
Introduction
Efficient laboratory planning is critical for optimising workflow and maximising productivity. With the advent of advanced technology, such as 3D lab designers, the process has become more streamlined and accessible. In this guide, we’ll delve into a comprehensive step-by-step walkthrough of utilising a 3D lab designer for effective laboratory planning, exploring each stage in detail to provide valuable insights for users at all levels of expertise.
Getting Started
Before diving into the design process, it’s essential to familiarise yourself thoroughly with the software. This entails exploring its interface, understanding its tools and functionalities, and navigating through available features. By investing time in getting acquainted with the software, users can optimise their utilisation and leverage its capabilities more effectively throughout the design process.
Designing Your Space
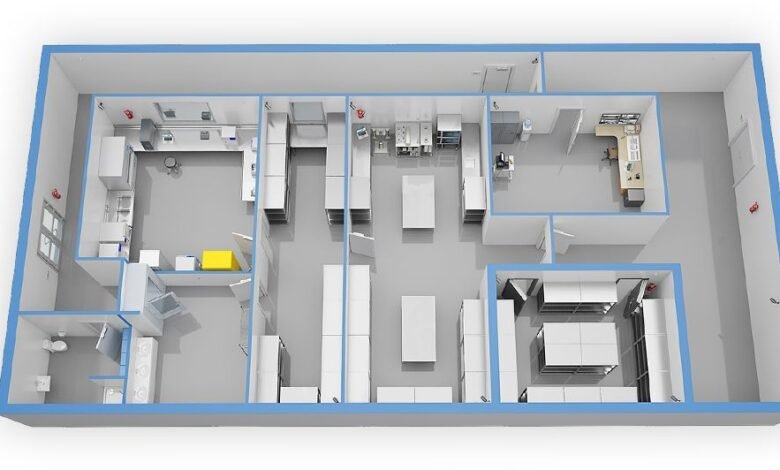
The cornerstone of laboratory planning lies in designing the physical space using an online lab designer 3D to accommodate equipment, workflow, and safety considerations effectively. This involves defining the layout, selecting dimensions, and allocating space for various laboratory functions. Considerations such as ergonomic design, equipment accessibility, and workflow optimization play a pivotal role in crafting an efficient and functional laboratory space.
Adding Equipment and Fixtures
Once the spatial framework is established, the next step involves populating the design with laboratory equipment and fixtures. Leveraging the extensive libraries available in the software, users can seamlessly integrate a wide range of laboratory apparatus into their design. Attention to detail is crucial during this phase, ensuring accurate placement of equipment and adherence to safety regulations and industry standards.
Fine-Tuning Your Design
With the foundational elements in place, the focus shifts to fine-tuning the design to align with specific requirements and preferences. This includes adjusting equipment placement, optimising workflow pathways, and refining details to enhance functionality and efficiency. The iterative nature of this process allows users to experiment with different configurations and iterations until they achieve an optimal design solution.
Reviewing and Finalising
Before finalising the design, it’s essential to conduct a thorough review to ensure alignment with desired specifications and standards. This involves scrutinising elements such as equipment placement, spatial organisation, and safety considerations. By meticulously reviewing the design, users can identify any potential issues or areas for improvement before proceeding to the implementation phase.
Implementing Your Design
With the design finalised and approved, the next step is to bring it to fruition through implementation. This entails collaborating closely with contractors, architects, and other stakeholders to ensure seamless execution of the design plan. The detailed model provided by the software serves as a valuable reference throughout the construction process, guiding contractors and minimising errors or discrepancies.
Evaluating and Iterating
Following the completion of the laboratory construction, the evaluation process begins to assess its performance and functionality. Gathering feedback from users and stakeholders enables identification of any areas for improvement or refinement. This feedback loop facilitates continuous iteration and enhancement of the laboratory design, ensuring its alignment with evolving needs and technological advancements over time.
Learn more blog categories here.
FAQs
What are the system requirements for running a lab designer software?
System requirements may vary depending on the specific software, but generally, you’ll need a computer with sufficient processing power, memory, and graphics capabilities to run the software smoothly. Check the software’s documentation or website for detailed system requirements.
Can I customise the equipment and fixtures in my lab design?
Yes, most lab designer software comes with extensive libraries of laboratory equipment and fixtures that can be customised to meet your specific needs. You can adjust dimensions, colours, and other parameters to tailor the equipment to your requirements.
How long does it take to learn how to use a lab designer software?
The learning curve for using lab designer software varies depending on factors such as your familiarity with similar software, your level of technical expertise, and the complexity of your lab design project. Generally, users can become proficient with the basics of the software in a matter of hours to days with regular practice and exploration of its features.
Is it possible to collaborate with others on a lab design project using the software?
Yes, many lab designer software platforms offer collaboration features that allow multiple users to work on the same design simultaneously or share designs with others for feedback and review. These collaboration tools can streamline communication and coordination among team members working on a lab design project.
Can a lab designer software simulate airflow and other environmental factors within the lab space?
Some advanced lab designer software packages include simulation capabilities that allow users to model airflow, temperature, and other environmental factors within the lab space. These simulations can help optimise ventilation and environmental control systems for improved safety and comfort in the lab environment.