
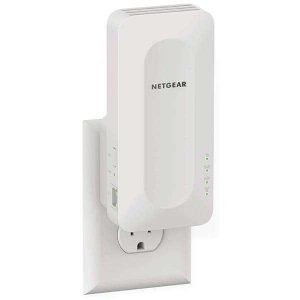
By following the Netgear EAX15 setup instructions, you may connect your WiFi booster to your home wifi network or modem. Your entire house has great internet access thanks to the wifi booster. It ensures that every device you own—game consoles, iPods, cell phones, and more—will always be able to connect to the internet.
You can maximize the benefits of your wifi network by using this technology. In addition to frequency responsiveness, it provides a dedicated channel for connecting your router and extension. Next, based on the configuration of your system, you have to select one of two alternatives.
How can I access the Netgear EAX15 Extender?
To log into your Netgear AX1800 extender, follow these steps:
- Open a web browser on a tablet or mobile device connected to your extender’s network.
- If the WiFi network names for your extender and router are different, type www.mywifiext.net into the address bar of your browser (SSIDs).
- In the email box of your browser, use http://extender’s IP address> if your extender and router have the same WiFi internet name (SSID).
- Press the Enter key.
- Kindly provide your login details.
- Choose the option to log in.
- To view and modify the extender’s parameters, select Settings.
The process of logging in to your Netgear AX1800 Extender is now complete.
Netgear EAX15 Setup Using WPS
For Netgear wifi extenders, the simplest setup method is WPS (WIFI PROTECTED SETUP).
- Turn on your extender first.
- Now, for a few minutes, press and hold the WPS button.
- Once your extension and router are properly connected, your LED indicator will turn green.
- Use the dual band range extender to repeat the process.
- This is also where you should input the network password that you use on your router.
- The WIFI extension instructions contain the default username and password.
- Lastly, join your gadgets to the upgraded Netgear_ext SSID.
Using the WPS method, your Netgear AX1800 WiFi setup is now complete.
How to setup Netgear EAX15 Manually
A different term for the manual method is web browser configuration. To manually configure a Netgear WiFi extender, follow the steps below:
- Turn on the Netgear extender by plugging it into an electrical outlet first.
- Link your router and Netgear extender together.
- To select the Netgear_ext SSID, navigate to the network management.
- Open any web browser.
- You will be directed to the mywifiext login page by default.
- If you don’t already have an account, create one now.
- Press the next button after that, and then the finish button at the end.
The manual setup of the Netgear AX1800 extender has been completed successfully.
Netgear EAX15 Setup Using WPS
For Netgear wifi extenders, the simplest setup method is WPS (WIFI PROTECTED SETUP). Kindly follow to the guidelines provided below:
- Turn on your extender first.
- Now, for a few minutes, press and hold the WPS button.
- Once your extension and router are properly connected, your LED indicator will turn green.
- Use the dual band range extender to repeat the process.
- This is also where you should input the network password that you use on your extender.
- The WIFI extension instructions contain the default username and password.
- Lastly, join your gadgets to the upgraded Netgear_ext SSID.
Using the WPS method, your Netgear AX1800 WiFi setup is now complete.
Since www.mywifiext.net setup and Mywifiext.local are the same terms, you can check your default login IP address, give us a call at our toll-free number, or chat online with one of our experts if you’re still having problems.
How to setup Netgear EAX15 Manually
A different term for the manual approach is web browser setup. To manually configure a Netgear WiFi extender, follow the steps below:
- Turn on the Netgear extender by plugging it into an electrical outlet first.
- Link your router and Netgear extender together.
- To select the Netgear_ext SSID, navigate to the network management.
- Open any web browser.
- You will be redirected to the mywifiext login page by default.
- If you don’t already have an account, create one now.
- Press the next button after that, and then the finish button at the end.
The manual setup of the Netgear AX1800 extender has been completed successfully.
How to Set Up Netgear EAX15 Using Installation Assistant
To setup your AX1800 using the installation method, according to the guidelines provided below:
- Put the Netgear AX1800 and the router in the same spot.
- It will switch on instantly if you plug it into an electrical outlet.
- The Netgear extenders network needs to be linked, the wifi manager needs to be launched, and your device needs to be turned on.
- Open a browser, then go to mywifiext.net.
- Then, while logging in, make a note of your password and username.
- It will show the Netgear installation manager.
- Lastly, finish configuring your extender by following the instructions displayed on the screen.
Finally, you have finished the NETGEAR AX1800 SETUP PROCESS by using the Installation Assistant method.
Troubleshooting steps:
The following troubleshooting techniques will help you fix issues that arise during the Netgear AX1800 Extender setup:
- Make sure the Netgear extender is getting adequate power from the wall outlet by checking.
- Connect your desktop PC to the fast internet.
- Among other things, make sure your extension is placed far from metal objects, room corners, and Bluetooth gadgets.
- After restarting it, try setting up your Netgear extender.
- Ensure that, while logging into mywifiext.net, you have enabled the latest version.
- Next, go back to the original settings on the Netgear extender.
How to reset a Netgear EAX15 Extender
The procedures listed below can be used to reset the Netgear EAX15 Extender configuration:
- The LED lights will turn green when you turn on your extension.
- Now, it will take your extension’s LED lights at least five minutes to become steady.
- Find the reset button on your extender.
- To make the LED light flicker, click and hold the reset button for up to ten seconds while holding an object of a comparable size.
- It will take at least two to three minutes as the LED lights on your extension settle.
The reset of your Netgear extender has now been completed.